
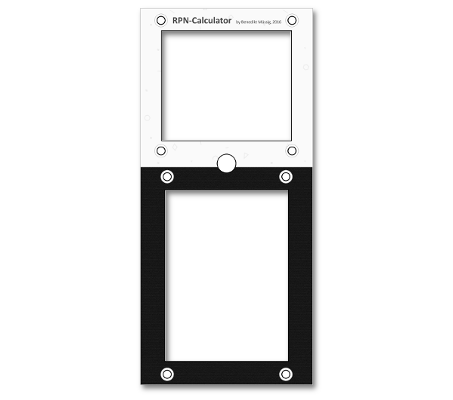
I have been working on the RPN-Calculator some more and decided that it needs a faceplate to look better. So I went ahead and designed one based on the CAD drawings I made earlier. I made the sides thicker where the keypad is to make it overlap the gap between the keypad and the case'es plastic. The final faceplate drawing looks like this:
Feel free to print it out yourself at 600 dpi if you want to make a similar project. The design files are available here. The patterns used are from http://subtlepatterns.com which I often use for my website projects. The SolidWorks files are available upon request (mail me at blog@bmuessig.eu).
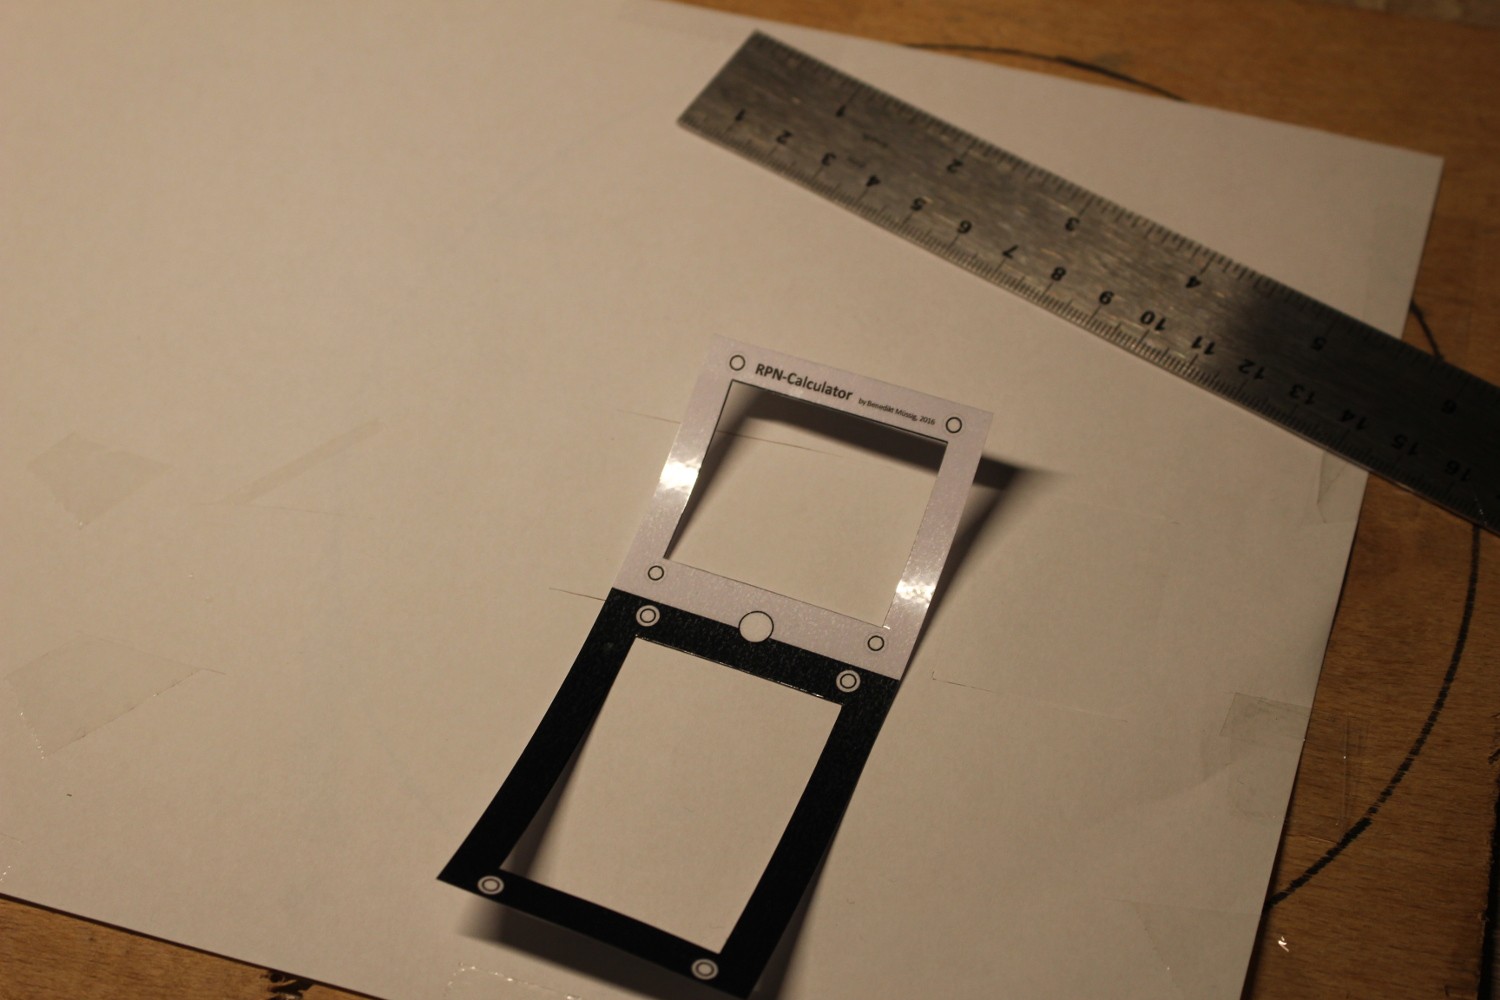
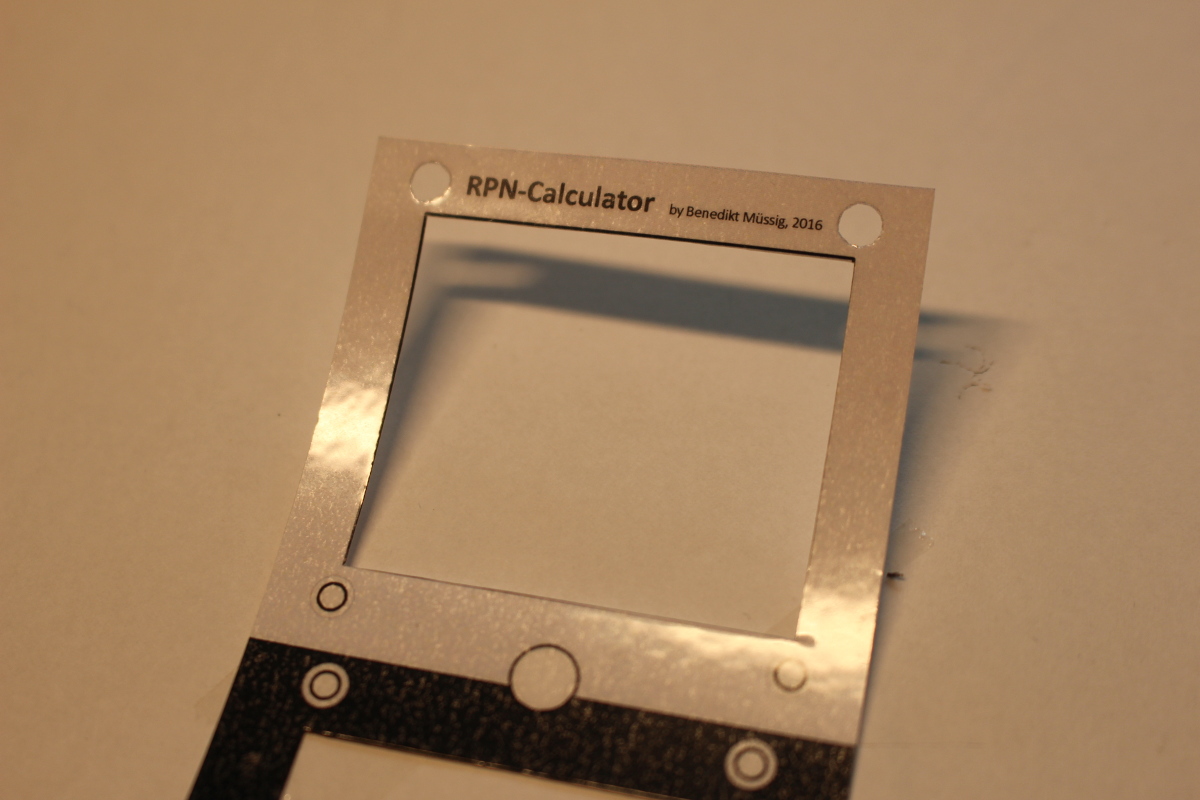
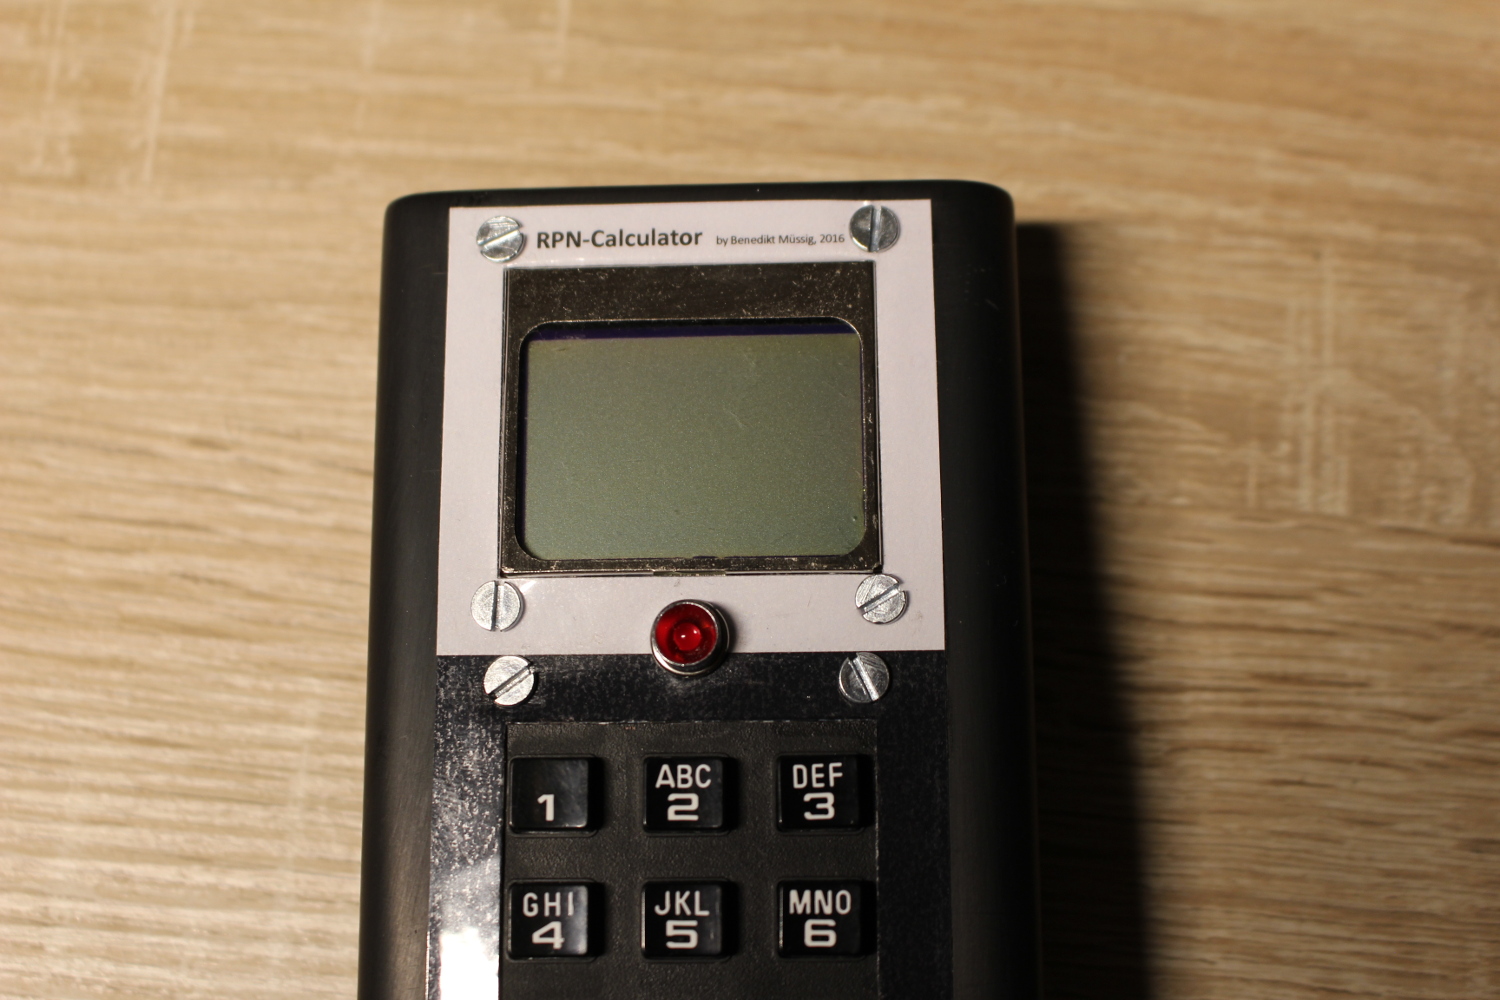
Anyways, back to the project. The next step was printing out the faceplate and laminating it. I was putting an empty sheet of paper between the backside of the faceplate and the other side of the foil so that only the topside of the faceplate got laminated and I can stick the faceplate to the case better. After laminating I cut out the display, keypad and the screw holes with a precision knife.
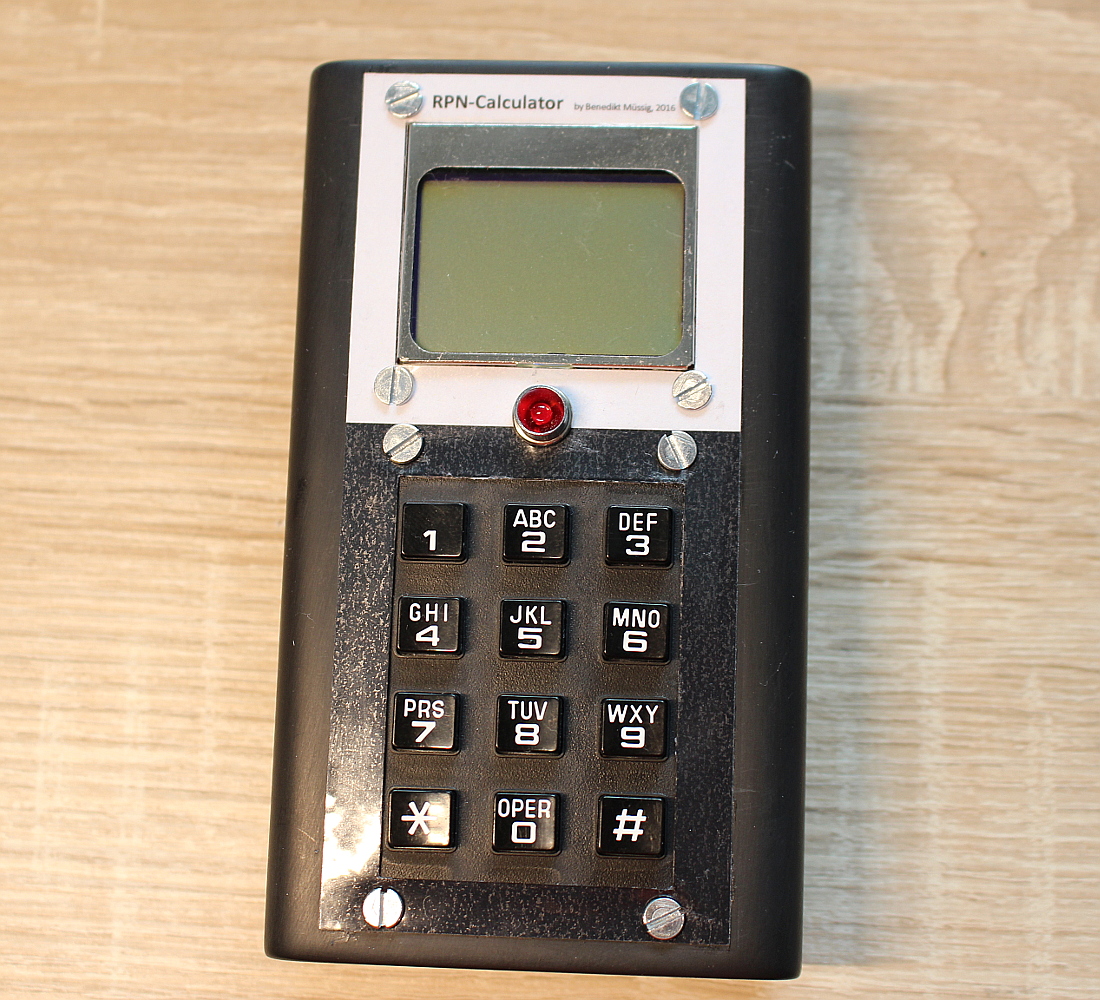
Then I sanded the upper half of the case and polished it. When I was happy with the look of the case I stuck the faceplate to it and installed the components.
This is how the calculator currently looks like:
Now I am waiting for the remaining parts to arrive. I ordered the CPU which will be a Particle Photon, which is an ARMv7-M @ 120 MHz with 128 KB RAM and 1 MB Flash. It also comes with a Broadcom WiFi coprocessor which allows remote programming of the main CPU, acting as a hotspot and connecting to the internet. For power, I have bought a slim 2500 mAh LiPo battery that I will be taking apart and modifying to make it fit and integrate into the project.